
How to Make Compost at Home
50% of our waste could be turned into compost for your garden. Here's how to make compost at home.
 Unless you have evergreens everywhere, autumn brings with it a raft of gorgeous coloured leaves. We recommend (after jumping in a pile of them!) raking these up and using them for your compost heap. Pull out any herbs and vegetables that have finished producing and add them to your compost bin, for the generation of rich mulch and matter to use on your garden later. Do not add Oak leaves to your compost bin as they take too long to break. Composting is a traditional method of recycling waste. Any organic material – kitchen scraps, plant material, lawn clippings, weeds, seaweed, wood ashes, straw and animal manure – can be used. The process involves soil micro-organisms breaking down the waste into a nice, sweet smelling crumbly “soil”.
How to make compost
- There is no set recipe when making compost – but there are living micro-organisms involved. When these organisms are provided with ideal conditions they do most of the work. Heat and good aeration are the secret to making compost. In the composting process micro-organisms give off heat which is vital in breaking down organic material.
- Choose a compost bin that suits your situation. There are many reasonably priced plastic or wooden compost bins available. Make sure it has a tight fitting lid to keep unwanted vermin at bay and to keep the rain out. Choose an area of soil to place your bin where it is sheltered from the sun, wind, and rain. Do not place the compost bin on concrete as this prevents air – water – worm movement. Make sure the bin is well away from the house.
- First break up the topsoil where your bin will be placed and add chopped-up coarse garden material to improve aeration and drainage. Avoid using material thicker than 5mm in diameter and cut up any bulky material. Air and moisture are very important for the microorganisms to break down the organic material. If there is not enough moisture, water will need to be added, but care must be taken not to over-water. If there is too much water the compost will be sloppy, smelly and will compact down.
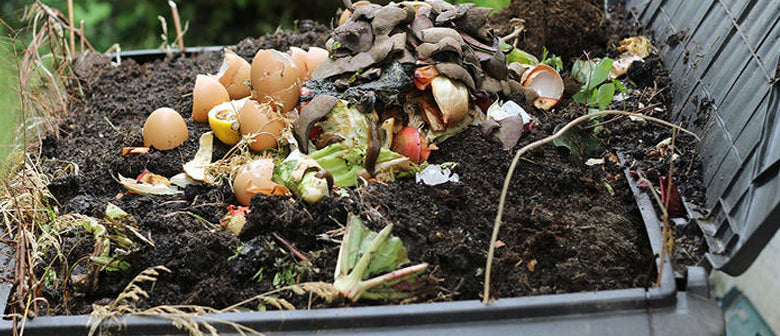
- Build up the compost in layers making sure you include coarse garden material to provide aeration and drainage. Follow with layers of vegetable peelings, grass clippings and plant material. Sprinkle each layer with lime, blood and bone or compost activator. This will speed up the decomposition process. Add a layer of soil on top of this. Repeat the process until the compost bin is full.
- After about two weeks the composting material will cool down. Turn the compost over to increase the aeration and speed up the composting process. Water can be added if the compost is dry. Now is the time to transfer it to a second bin. This will increase aeration and speed up the composting process. Incomplete, decomposed material should not be used on the garden, but can be cut away with a spade and kept separate to start the next batch.
- A spiral aerator tool makes it very easy to turn your compost and will speed up the composting time/process.
- Depending upon the time of year, compost can be ready any time from two to five months – in summer the process is much more rapid than in winter. The compost is ready to use when it has cooled down completely and does not get hot after turning over. If the compost still has heat in it and is applied to the garden it can do damage to young plants.
- Compost should be crumbly, dark brown to black in colour, with a pleasant earthy musty smell. Spread it around flowering plants, vegetables, ornamental shrubs and roses, working it into the soil.
- Only use material from healthy plants in the compost heap. Diseased material and invasive plants like dock seed heads, dandelion roots, couch and oxalis should not be used as the may survive the composting process to re-establish in the garden later. Avoid putting food scraps of dairy products, meat or bones into the compost heap.
- Compost is suitable to use as garden mulch. Which will help to improve soil structure, conserve soil moisture and suppress weeds. It conditions the soil by the addition of organic material and recycles waste.
What you can add to your compost

- Egg shells
- Coffee grinds and tea bags
- Fruit and vege scraps
- Leaves and small garden waste
- Egg cartons and cardboard
- Newspaper
- Seaweed
- Weeds without seeds
- Wood ash
- Manure
How to start a worm farm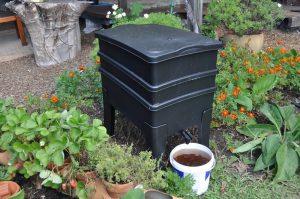
A fun way to recycle your kitchen scraps and garden waste into a nutrient rich, natural fertiliser for your garden is to start a worm farm.

- Identify the container for liquid collection. On top of this place the bin which has holes in the bottom, this is the first working tray. Add a couple of layers of newspaper across the bottom and then an 8cm layer of bedding material such as peat moss or aged compost to start the worms off.
- Start by adding up to 500g of worms to the bedding material and cover them with a blanket, worm blankets are available in store.
- Allow the worms a few days to settle into their new home then add a handful of food scraps to their surface feeding area as well as some paper towels, egg cartons etc., and place the worm blanket back on top.
- Keep the carpet and worm food materials damp, watering approximately one litre per week.
- Place your worm farm in a cool dry area of the garden away from the hot sun.
- The worm population will gradually increase and will self- regulate at around 12 months.
- Continue to feed regularly rather than in large amounts, up to around six litres of waste per week.
- When the first working bin fills up with vermicast (worm poos) place another working bin on top and continue with feeding into the second level – the worms will start to move upwards. When this fills add the third working bin and only feed in this layer. When the third working bin is full you can use the first working tray of vermicast on the garden. Place the empty bin back on top, this rotates the layers of the worm farm