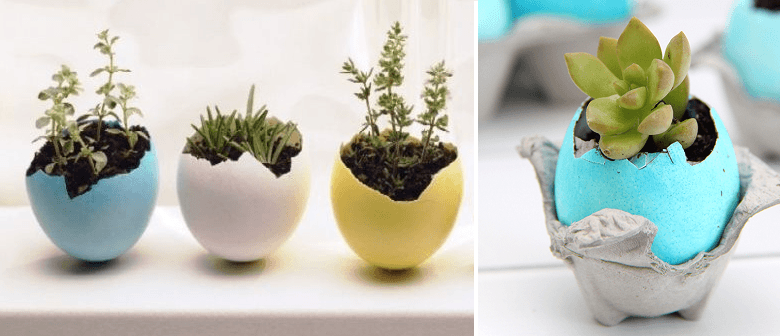
These Easter Egg Planters are a great project to do with the kids. They’re easy to assemble and so much fun to watch grow!
 You will need:

- Eggshells (As many as you would like to make. It’s good to have a few spares too in case they break!)
- Potting mix
- Seeds/succulents
- Nail or needle
If you would like to colour the shell you will also need:
- Food colouring
- Vinegar
Step 1
Carefully crack the top third of the egg. You can do this by tapping the egg on the edge of a bowl, or tapping with a sharp knife.
Empty out the eggshells completely and wash the shells out well
Step 2
Take the empty eggshell, and poke a hole in the very bottom with a sharp object. If you are using a thin needle or pin, widen the hole a bit with a pushpin or small nail. This hole provides drainage, so the roots of your plant don’t drown. You only need to poke one small hole; more than one might crack the shell.
Step 3 (skip to step 4 if you are not colouring your shell)
To colour your eggshell, prepare dye by adding around 10-20 drops of food color to 1/2 teaspoon of vinegar, add 1/4 cup of warm water and stir. You can try different proportions to get different shades. Dip the egg shell into the dye solution, you may leave it a little longer to achieve a darker color. Take it out and place on baking paper or a plate to dry for 15-30 minutes.
Step 4
Using a small spoon, fill your eggshell with moist potting mix and then add you selected seed to the soil. Push the seed abut 1cm deep into the soil. If you want quick results, try using cucumber, bean or marigold seeds.
Step 5
Your planter will thrive in a warm sunny spot to sit on a windowsill and watch it grow!
NOTE: Once your seedling is around 6-8cm high the whole egg planter can be planted into the garden.