How to Make Beeswax Wraps
By Dee Archibald
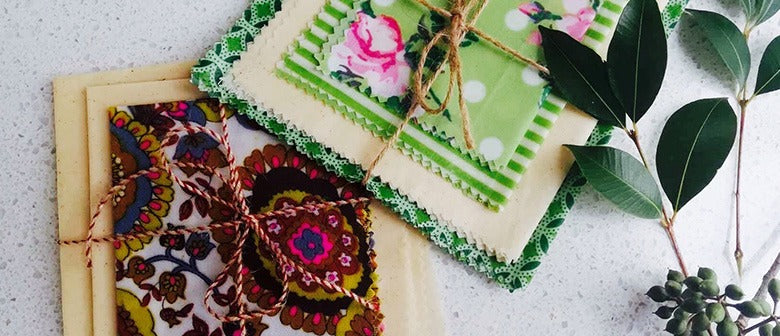
Beeswax wraps are the perfect alternative to clingfilm and pretty fun to make! I even have an option here for those pesky (but very convenient) zip lock bags!
Beeswax wraps are air tight, waterproof, flexible and sticky. Not only that but they are antibacterial and anti-fungal! Say goodbye to cling film, there’s a new sheriff in town!
You will need:
– 100gm (or roughly 1 cup) of beeswax (white or yellow)
– 20-30gm pine rosin (this is the secret ingredient that makes them sticky)
– 3 Tbsp Jojoba oil
– Some off cuts of cotton fabric cut to desired sizes, with pinking shears to stop them from fraying (you could even use some old sheets for this).
Tools needed
– An iron
– A large OLD paint brush (this won’t be able to be reused for anything else afterwards)
– Baking paper
– Pinking shears
– A Pyrex jug
– Sewing machine (optional if you want to make zip lock bag alternative)
Step 1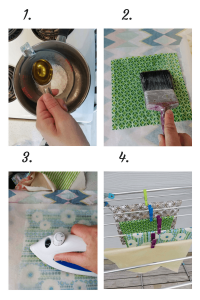

Make a double boiler by filling a pot with water and bringing it to boiling, then turning it to a simmer. Break the pine rosin down with a Mortal and pestle (or hammer and bag) until it reaches a crumbly powder. Hang the handle of your Pyrex over the side of the pot after adding the ingredients to it. Let it melt down. This should take around 20 mins as the pine rosin will take longer than the wax and will need to be mixed in (keep the wax on simmer for the entire duration of the project).
Step 2
Put down a thick layer of newspaper and a long piece of baking paper on top. Heat up your iron. Place your first fabric square on top and start to brush it with well mixed wax mixture. You don’t need to go right to the edges at this stage and it doesn’t even need to be that even.
Tip: If your square doesn’t fit within the baking paper do the top first and flip it over to finish the bottom.
Step 3
Fold the other end of the baking paper over the top and use the iron to press and spread the wax evenly. You will be able to see through the baking paper so you can squeeze the wax with the iron directing it to the edges.
Step 4
Lift the top sheet of baking paper and peel the wrap off, then hang to dry.
You should be able to make around 10 different sizes from the ingredients above. If that’s too many for your household, they also make great gifts! Or you can try some zip lock bags too, super handy for snacks on the go.

How to make Bees wax resealable bags

Every thing you have done in the process above is the same, except cut your fabric into more of a rectangle shape so that when you fold it in half it makes the size of bag you require. Then fold it in the middle with the pattern on the inside and sew a seam down each side. I’m not going to pretend this wasn’t messy, the waxy surface does transfer on to your machine a little so if you don’t want to have the job of cleaning it up after, you could try sewing the fabric before you wax it.

Turn it inside out and press the seams out. Once you’ve filled with snacks press the top edges together to make it air tight. These can even be used in your freezer. Bonus!
Wash your wraps with soapy cold water.

Happy Crafting (and enjoy saving this beautiful place in which we live) x