How to Espalier Fruit Trees
For some, the idea of fruit tree shapes might seem a little far-fetched, however, the art of espalier is becoming increasingly popular, especially for smaller gardens.
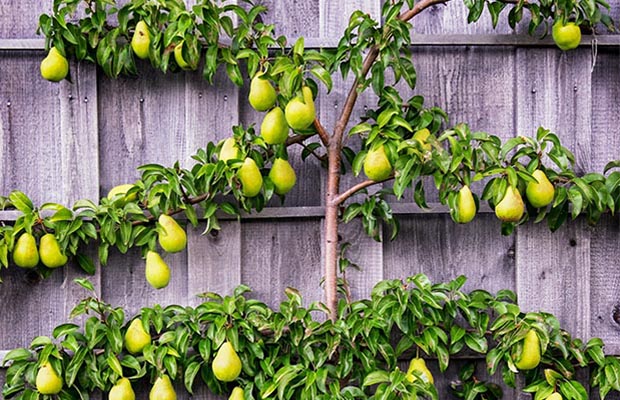
Put simply, espalier is a decorative style of fruit tree training. Featuring in both formal and informal gardens in Europe, this method of tree training is attracting kiwi gardeners who are keen to create a compact and attractive tree feature. Espalier trees are often grown against a wall, but wires between posts can also be used to support and train the tree. By doing so, the tree creates the perfect divider for different areas of your garden, while still retaining sunlight and visibility.
How to train your Espalier Tree
Two Methods

Triple Horizontal Cordon (for apples, pears and nashi)
- In spring, cut the whip or leader to where you want the lowest set of branches to form- usually at the first wire.
- The tree will branch out from where you have cut it back. Select the best three sprouts and pinch off the rest.
- When two of the sprouts grow to about 7.5cm long, make them the horizontal arms and begin tying them along the bottom wire. Make sure to use material that will not damage or restrict growing branches.
- Let the other sprout grow vertically to the wire (you may need to use a bamboo stake), and cut it off again. Once this vertical limb has sprouted, repeat the process from step 2, selecting and tying horizontal sprouts, leaving one to grow vertically to the next wire.
- As the horizontal shoots grow, continue attaching them to the wires. Pinch off shoots that grow toward or away from the wall. Prune frequently and lightly.

Fan or Palmette (for stonefruit, quinces, berries, citrus, figs and persimmons)
- In spring, cut the whip or leader to where you want the lowest set of branches to form - usually at the first wire.
- The tree will branch out from where you have cut it back. Select the uppermost shoot for the central or main leader, with the other shoots forming side limbs at 45 degree angles.
- As the tree grows, head the leader just below the next wire, repeating the procedure until you reach the top wire. From then on, pinch back and remove the other shoots.
- Ensure renewal of fruiting wood from the main branches.
Growing Steps
- First, it’s important to plan your pattern and the type of fruit tree that might work. Consideration should be given here to the age of wood the fruit is borne on.
- Choose a location – preferably somewhere north-facing that gets a minimum of 6 hours of direct sunlight.
- Prepare the support, fixing horizontal wires to a structure that will support your espalier and train the branches at desired angles. Wires should be spaced 30 – 60cm apart, with eyebolts used on fences and walls to keep the tree away from the structure.
- Plant your tree, setting it in the ground about 30cm from the wall, fence or post structure.
- Your tree is ready to begin its training. For the first couple of years, while your fruit trees are getting established, remove some of the fruit before it gets much bigger than pea-sized which will help promote a higher quality for the remaining fruit.
For more information and expert advice, come in and talk to one of our friendly staff at your local Palmers store.


