By Bec Wenzel
I grew my first batch of microgreens last year and I was pleasantly surprised at just how easy they were to grow. I’m now an avid microgreens grower and have grown them on quite a number of occasions.
The number one thing I loved about the microgreens was that it took way less time to sprout than I thought it would. I went through the process and put them on my windowsill to sprout, checked on them two days later and not one but about five out of the seven pots were sprouting. I can’t explain the thrill I got, geeky I know, but I was so excited to see their little heads through the soil.
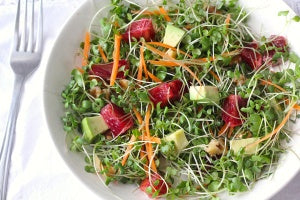
 Microgreens can add gorgeous textures and colours to your average garden salad and they can also add a variety of flavours depending on the type you use. Being able to change my normal garden salad into a beautiful exciting dish in an instant was pretty amazing.
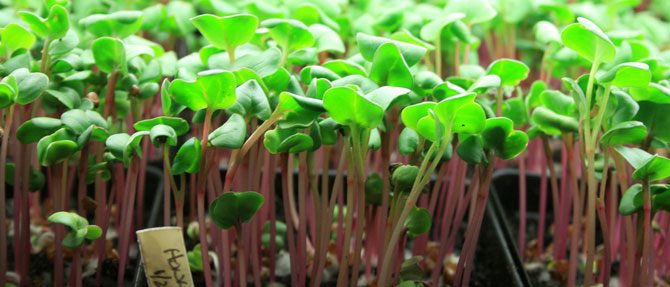
Microgreens are a small vegetable green, smaller than what is classed as a baby green, but bigger than a sprout. They are ready to use after they have produced two true leaves and are about 5cm tall. These come after the cotyledons which are a kidney shaped leaf. True leaves develop from the plant stem. They should be ready to eat anywhere between seven days and three weeks old.
The process I used varied a little depending on the seed I used. I chose some beginner friendly seed such as radish, fiji feathers pea, rocket, beetroot bulls blood, chickpeas, lentils and cress. I used a few different soil mediums to experiment. I used seed raising mix, potting soil and coir with vermiculite for seed cover. The best results I got were with the potting soil and the seed raising mix so I will explain the process with using either one of those mediums, and personally I still use them both depending on what I have at home.
I soaked the chickpeas, lentils and Fiji feather peas overnight in glass jars in warm water to speed along the sprouting process. This is usually something you would do with any of the bigger seeds. Besides the soaking process I did everything else the same way. I found some containers from around the house. The containers you want to use should be shallow and wide with good drainage. I had two bonsai pots that looked stunning with the microgreens but I also just used some old seedling punnets which is a great way of recycling. I filled the pots up with growing media, make sure not to fill right to the top and level and flatten the soil gently. I then evenly spread the seed across the soil, be generous with the amount but not too generous as you don’t want the seed to rot.
The seed covering is what I think really helped speed up my sprouting process, I used a wet paper towel for most of the seed, the vermiculite I used for some just wasn’t as effective. Basically just get some paper towels, you could also use some lightweight linen, wet it to make damp and then cover your seed with it. After I laid the damp paper towel over the top, I used plastic cling wrap to wrap around the pot to use as a mini green house. I’ve since been saving all my strawberry, or cake trays with plastic covers to use instead as it is more economical rather than single use.
After the seed covering I placed the pots on my windowsill in the kitchen which is a warm and sunny position to let germinate, when I checked on the moisture levels two days later I was very excited to see most had sprouted. It was at least another week until they were ready to eat but being able to see them growing really helped. Make sure not to let the seed covering dry out, I took my cover off as soon as I’d seen they had sprouted but I then used a spray bottle to water them with so it was nice and gentle on the sprouts.
 You can leave your microgreens inside as long as they get a good amount of sunlight. They can make quite a gorgeous display, the greens I had in my bonsai plants looked simply amazing and I had them displayed on my outside table. The others I simply left on my windowsill in my kitchen, ready to use as I needed.
Microgreens will require some nutrients after they have sprouted, I used a seaweed based liquid feed.
When harvesting my microgreens I always make sure to cut off just what I need then leave the rest to grow, I harvest just before I create my dish so they stay nice and fresh and jam packed with nutrients. When cutting, if you cut above the cotyledons (kidney shaped leaves) they will re-grow. Micro greens should really only be used for two to three harvests all up.
I loved using the beetroot for the deep red colour it adds to the salad, it’s great when you’re having guests over. I also enjoyed the cress as it added that little bit of pepper and zest. There is a huge amount of choice when it comes to microgreens and I think half the fun is experimenting with the flavours and I will continue to do so. To sum up, microgreens are cheap, easy and perfect for indoors and out and are super nutritious so I’ve had a great experience.
You can read more of Bec’s gardening tips here:
How to grow a salad and smoothie garden
Gardening in small spaces
Grow your own fruit bowl

